A Tach for the Truck
Because my principal goal with this website is to post widely appreciable and useful content… here I bring you: How to install a ’60s Jaguar tachometer in a ’68 Dodge Sweptline 1/2 Ton Pickup.
Heh, all kidding aside, this is a little project I have thought about for a while, and it came together nicely. Let’s see:
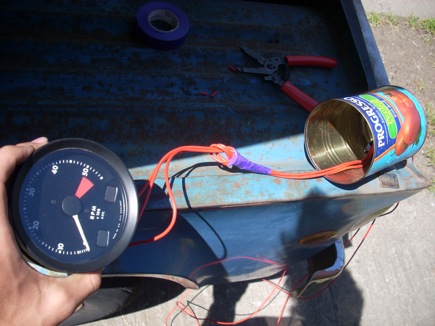
The Jag tach has two wires of interest- a green wire attached to a faston terminal and a blue and white wire attached to a sort of banana plug thing. The green is +12v and the blue/white is the pulse signal. The metal body of the gauge must be attached to a solid vehicle ground. I used a small ring terminal to attach a wire to the tach body for ground. The signal wire must attach to the ignition coil, on the low voltage terminal that is attached to the distributor.
It worked on the first try!
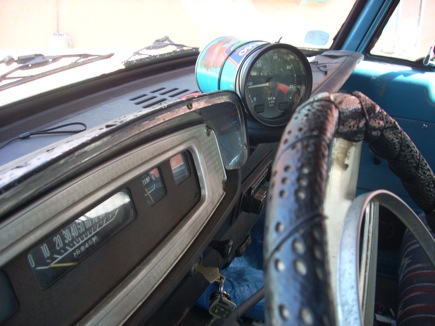
 Then- the small matter of attaching it to the dashboard, running wires for it, and attaching it to a power source that is only energized with the keyswitch on. It really needs a housing, to protect the wiring and exposed plastic on the rear of the gauge- remember, it’s british and almost 40 years old! For that, a tomato can turned out to be just the ticket.
 I spliced +12v power into the radio power lead (already well-hacked and spliced), ran the signal lead out through the firewall to the coil, and wrapped the ground wire around one of the windshield wiper motor bolts (along with another unknown wire)
Zip ties finish the installation. It’s beautiful.


This should work in any car with distributor and coil type ignition, and with most any tachometer, given that it came out of a car with the same number of cylinders as your target vehicle (this tach is from a Jag with inline 6, the dodge has the venerable 225 slant 6). Usually it is pretty easy to identify the +, – and signal connections to the tachometer gauge.
on May 21, 2009 at 9:45 am
·